 Phrase-Lock helps you to use your login data optimally. In the settings you configure the app and your USB-Key according to your personal security demands. You provide your USB-Key with an individual master key and your login data are protected at the highest level. In the main mask, which appears immediately after the start, your most important login data are available as favourites. From there you can also quickly and easily access all other functions such as categories, a search function and the edit mask.
Get to know the possibilities of Phrase-Lock here and take some time for it, after all it’s all about your safety.
The start screen
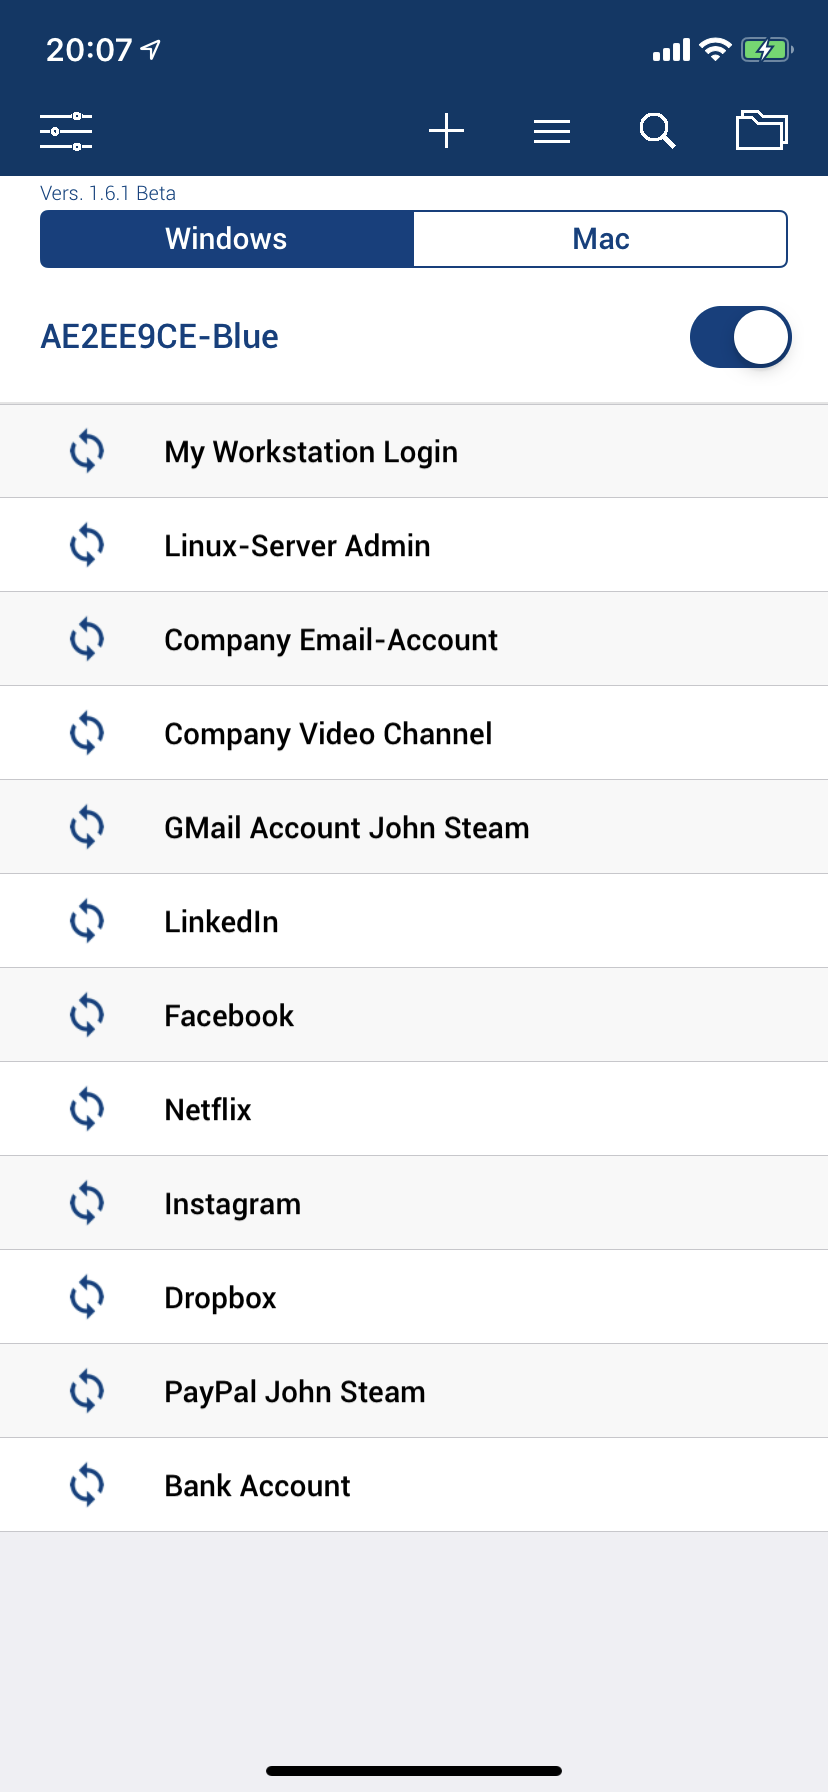 Here you see the start mask after a USB-Key has been installed with some login data as favorites. You must specify the operating system with which your USB-Key is to work. You can choose between „Windows“ and „Mac“. For Linux you should also select Windows. This selection is necessary because Macs and all other operating systems work differently. Strictly spoken it should have been Mac and Non-Mac, but that sounds too technical.
On the right you will also find a switch to disconnect or manually reactivate the connection to the USB-Key.
On the top left you will find the settings. The word Setup is also used synonymously for the settings.
With the plus sign at the top right you can create a new empty login record.
If you tap the icon with the three lines, you can rearrange your favourites.
Tap on the magnifying glass, you get a search mask to search fragmentarily for a login data set The folder symbol at the top right for the categories and their configuration.
If you briefly tap on a login data record in the start screen, the send menu opens to enter the login data via the USB-Key.
Send & enter passwords
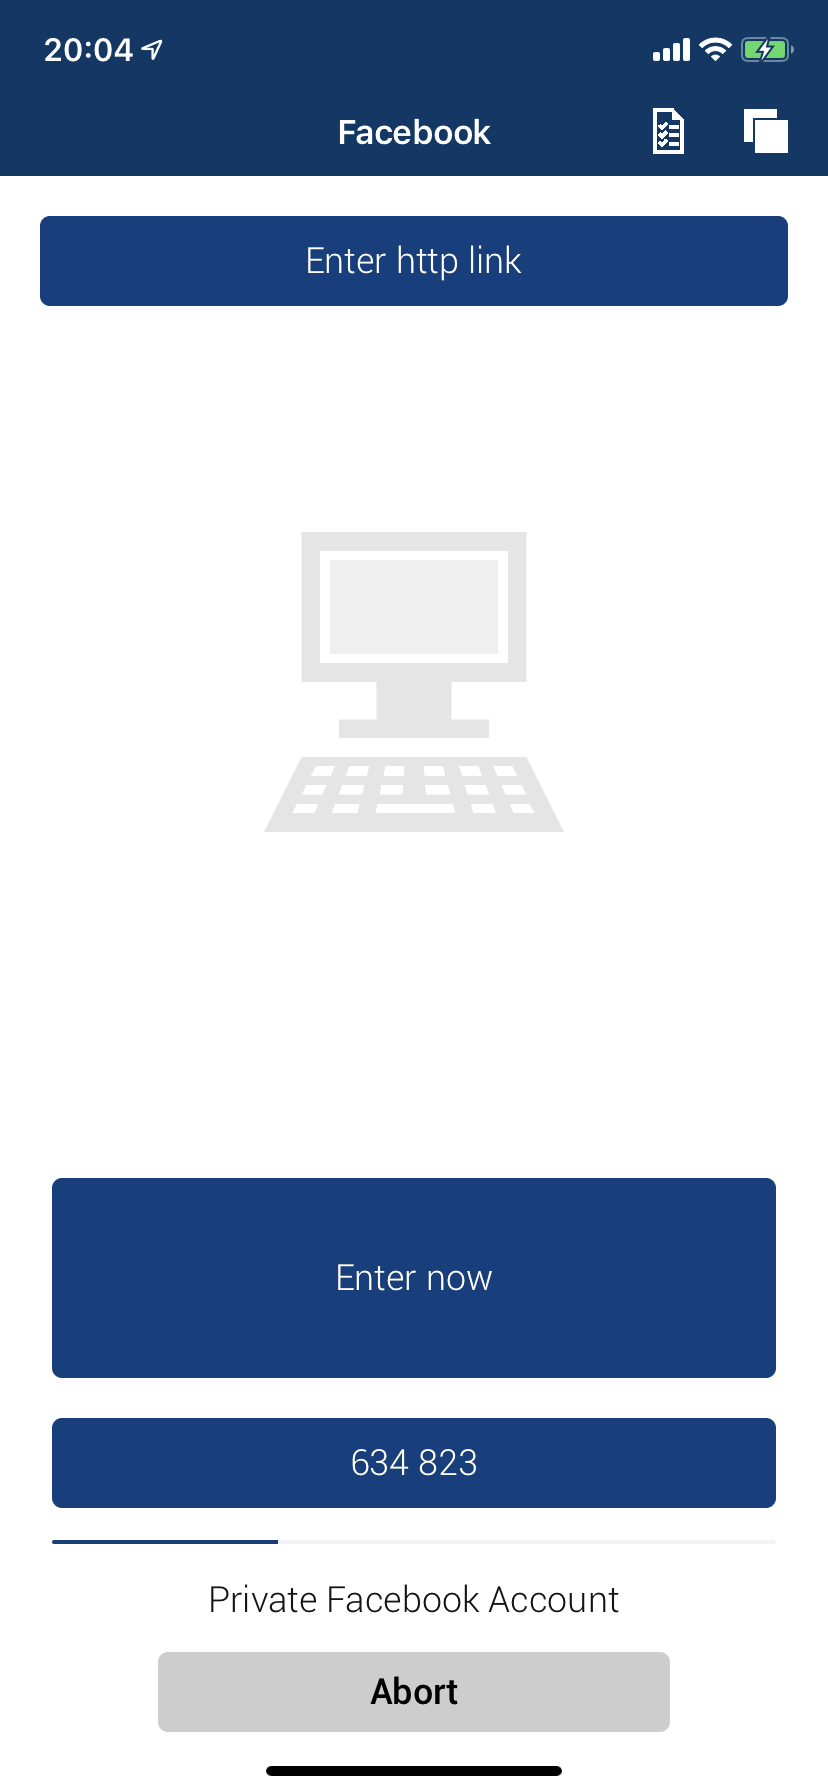 If you want to enter login data, briefly tap on the desired record and the dialog appears. If you tap on the large blue button, the contents will be entered via the USB-Key in the input mask of the computer according to the settings of the login data record.
At the top right you will see two menu items where you can enter or copy your login data individually.
With the menu “Enter individually” (list symbol) you can enter the elements of the login data record individually. This may be necessary, for example, if you want to change a password or because your login name is already in the mask.
With the symbol for “Copy & Paste” you can use the login elements individually directly on the device itself, if desired. For example, you can call up a link directly on your telephone to get to a specific page. Filling in any necessary login data is then done with the Auto-Fill functions. For security reasons, you should only copy and paste login data in absolutely exceptional cases.
Create a fictitious login data record at the beginning and experiment with it a little. You’ll see how much pleasure Phrase-Lock gives you when you see how automatic input works.
Organization
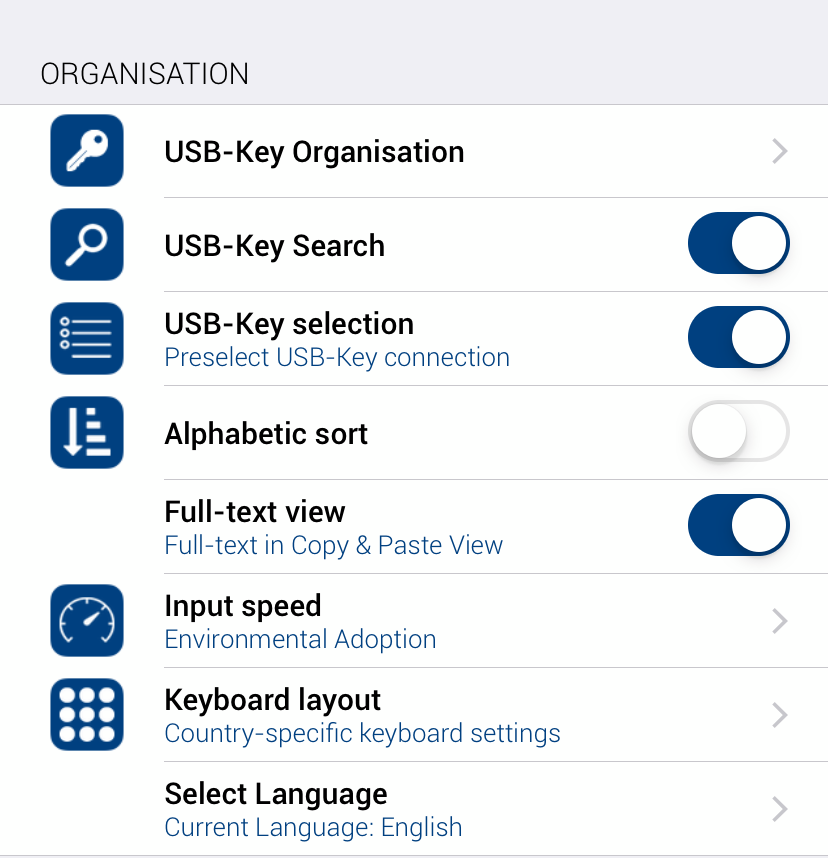 In the first block „ORGANISATION“ of the settings, or Setup, you can organise your USB-Keys. Here you set the keyboard layout for the USB-Key and the language in which Phrase-Lock presents itself to you.
Your login data will be sorted in the order of their input, which you can change at any time. If you prefer to sort your login data alphabetically, activate „Alphabetical sorting“.
Security & Auto-Fill
 In the block „SECURITY“ you protect your Phrase-Lock App additionally with fingerprint or Face-ID. If you activate this function, you must enter a PIN code in the case of an emergency. If your device has no biometric functions, you still have the option of defining an individual PIN code.
When you activate Fingerprint or Face-ID, a secure data container is created in the key store of your telephone in which the master key of your USB key is also stored when you activate its offline function. This is the prerequisite for using the Auto-Fill function of your telephone.
On iOS devices, only the activation of QuickType support is displayed in the „AUTO-FILL“ block. How to activate the Auto-Fill function on your phone is explained in „How To – iOS & Auto-Fill“.
With Android devices you can activate the Auto-Fill function of your phone directly from the Phrase-Lock app. Accordingly, you have more setting options in the „AUTO-FILL“ block. You can find the exact description in „How To – Android & Auto-Fill“.
Synchronisation
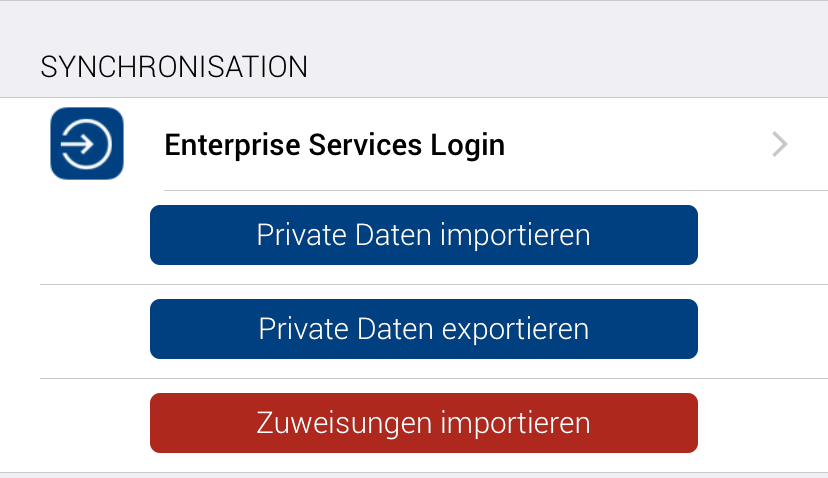 In the block „SYNCHRONISATION“ you import and export login data via the Enterprise Services. Use the first menu item “Enterprise Services Login” to open your virtual container. This contains all your login data intended for synchronization. Distribution, editing and synchronisation of login data to share with other USB-Keys and users becomes very easy and clear. The Enterprise Services are designed with the strictest security of secrets in mind. To do this, you generate your own synchronization key that is only used for transporting to and from a cell phone.
Please take 10 minutes to read the Enterprise Services manual. It describes in details what makes these services so secure.
Backup & Restore
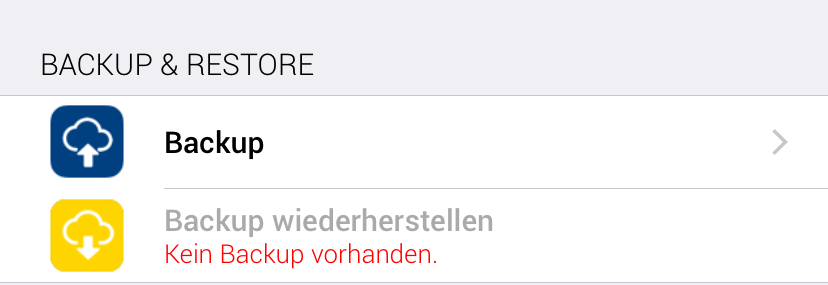 Backup and restore can be found in this block. Backups can also be read from other USB-Keys or cell phones if the affected USB-Keys were encrypted with the same master key. This also gives you an easy way to transfer login data.
Please note: If you do not remember the master key for a particular backup, there is technically no way to read or restore it!
Search
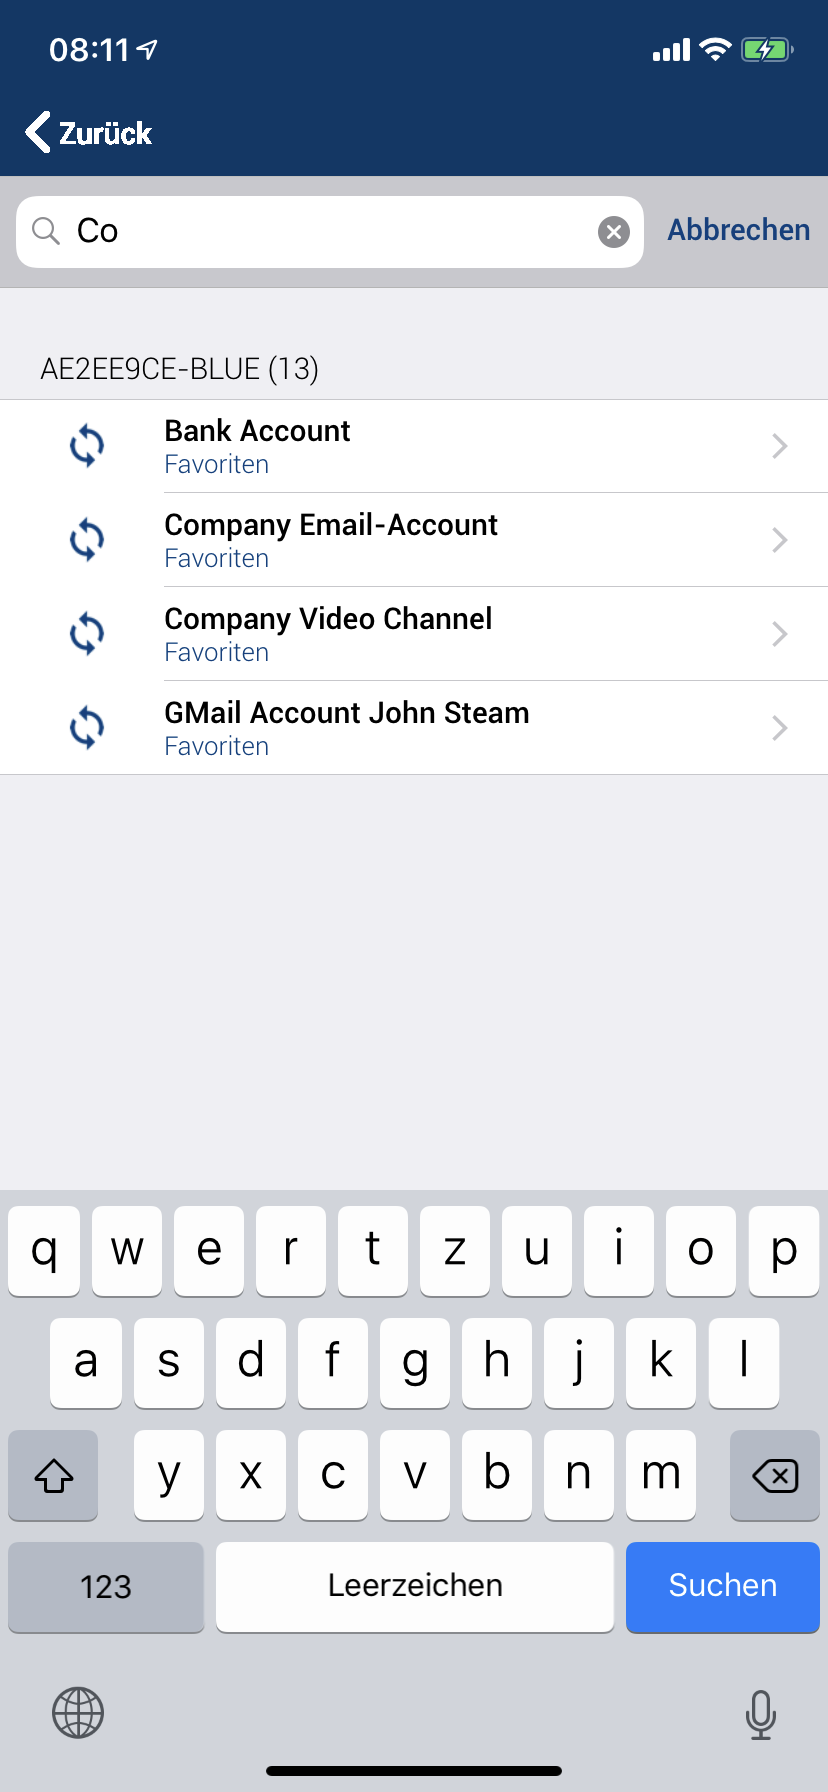 Tap on the magnifying glass in the start mask to open the search dialog. Here you can search for the name of a login record that you need quickly but rarely and can’t remember in which category you saved the record. More than 150 records are not uncommon for Phrase-Lock; this search dialog can be quite useful.
Details
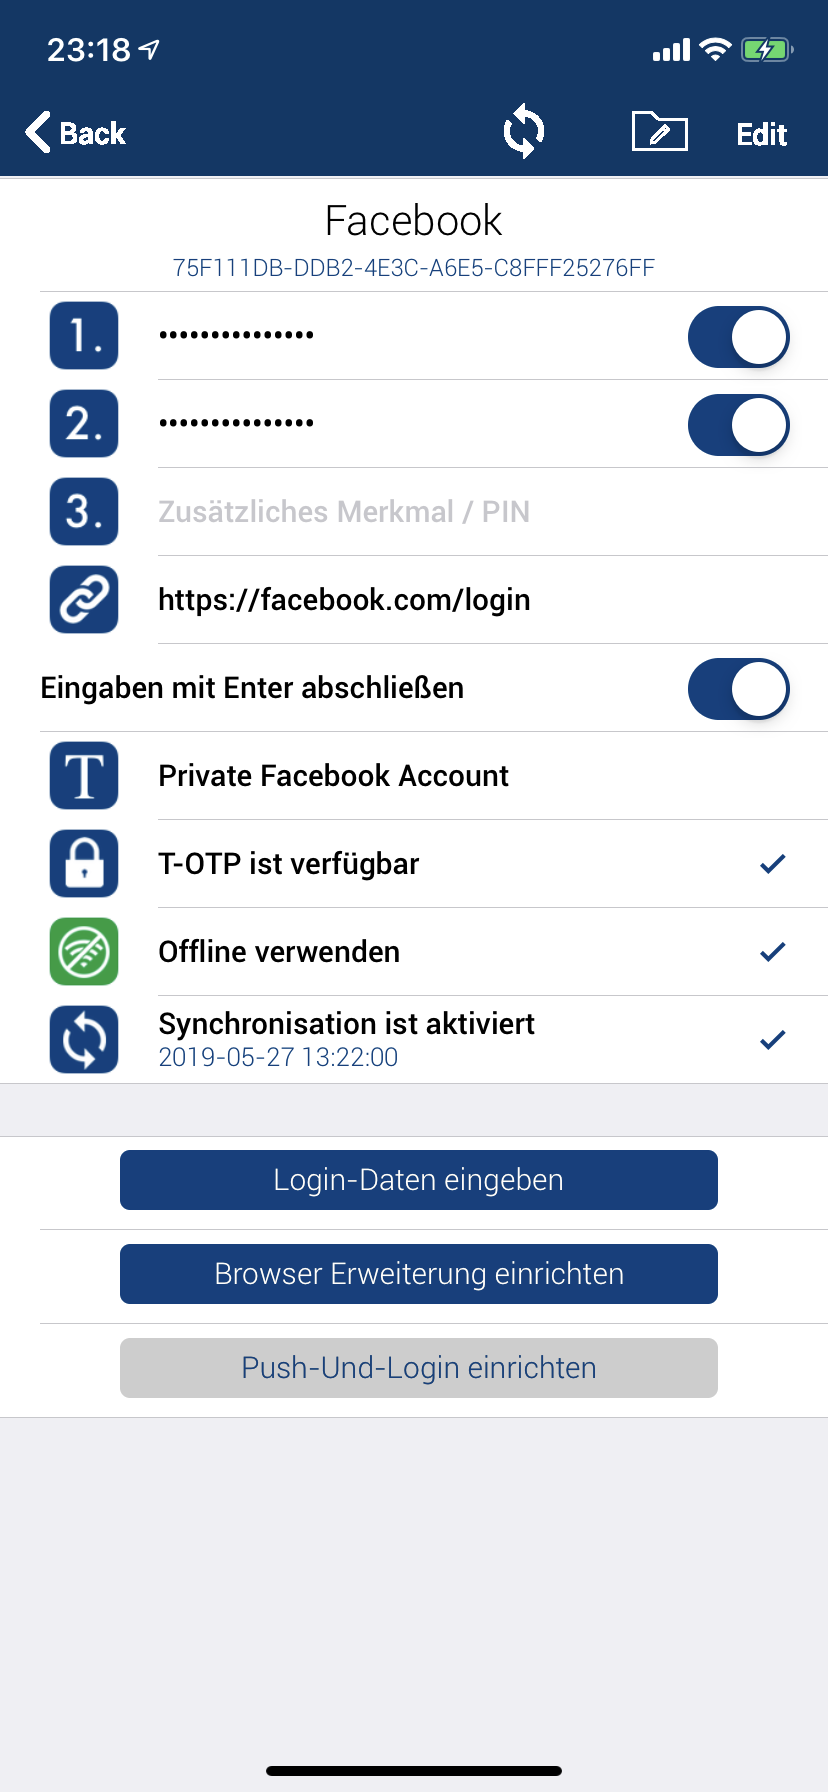 The masks „Details“ and „Edit“ are opened if a record needs to be edited. You can define up to three parameters for each login data record, which are transferred during automatic input. Use the buttons on the right of each line to determine whether the parameter is also transmitted. You can also define a link to call up the corresponding web page, for example. Phrase-Lock also supports one-time passwords if you need them. With the button “Enter login data” you can call up the send dialog from just from here.
With the buttons “Browser Extension Setup” and “Push-To-Login” you can create special links to call up your favourites quickly and easily in the browser of your choice. A push message to your cell phone then selects the appropriate account; all you have to do is tap your phone again and you are logged in.
Edit
 You can call up the edit mask either from the details view or directly from the context menu of the respective login data record, e.g. in the start mask. Here you edit your login data in the order in which they are entered later. Passwords are easy to generate, you never have to think about which again. If you have a lot of data to enter, the QR data generator on this page supports you. This allows you to quickly transfer many login data to Phrase-Lock.
USB-Key Details
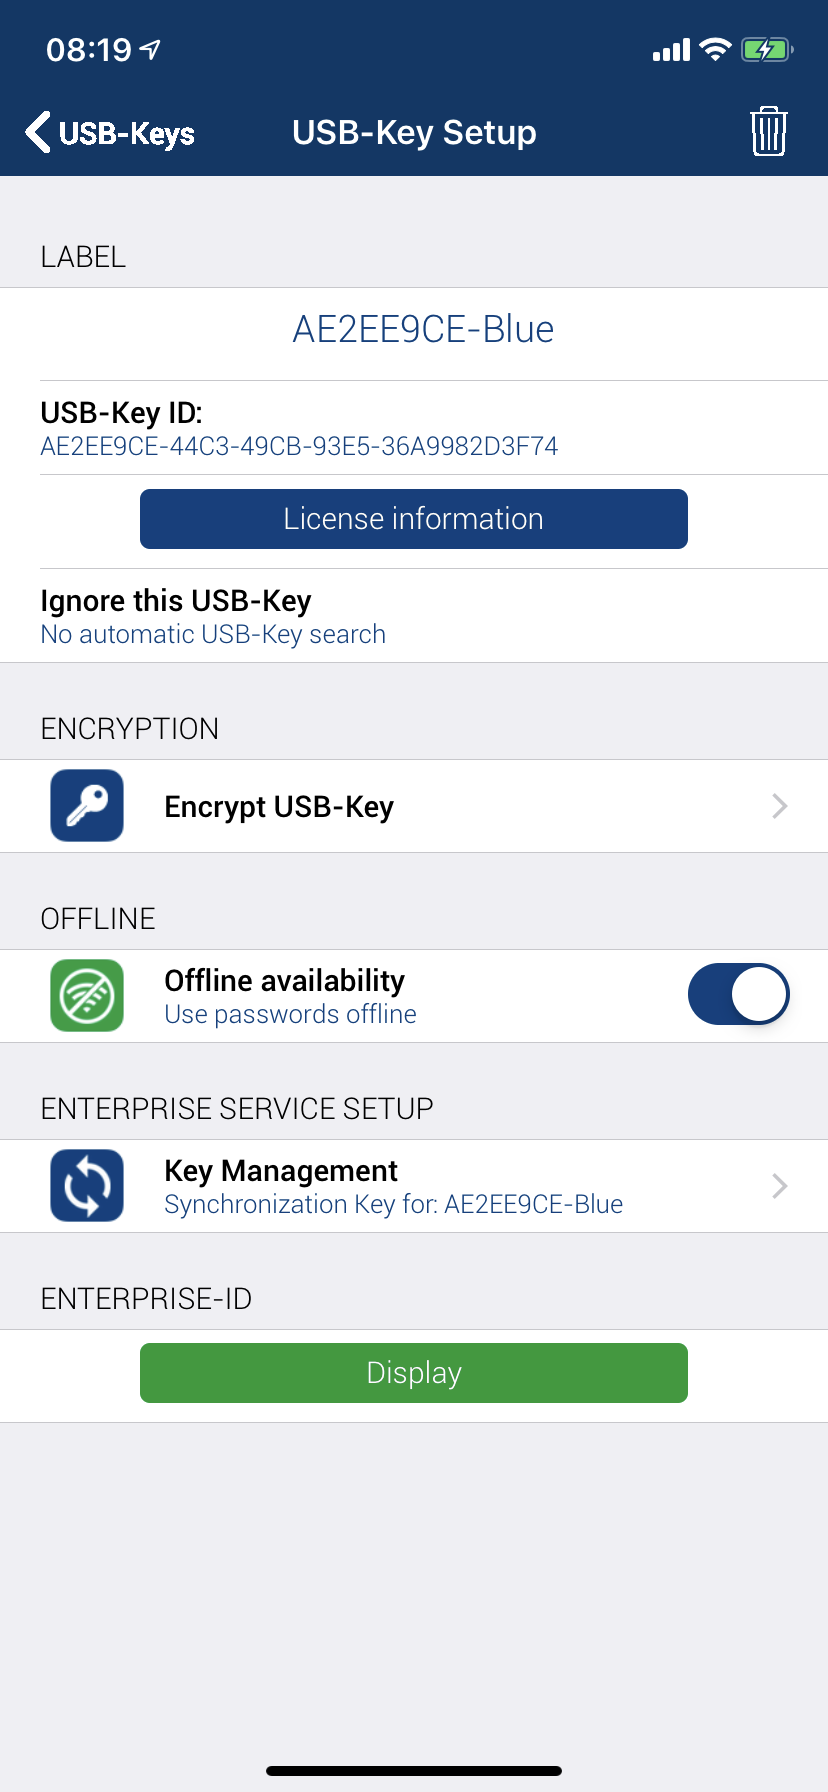 If you have installed a USB-Key, you can still make some individual settings. You will only see the complete menu if you have previously carried out the license information once. All USB-Keys have the same master key and we strongly recommend to change it after installation.
In this mask you also determine whether you want to use the login data belonging to this USB key offline.
